
- LED installation, Push Button Concept -
--
LED installing......my favourite part....for this portion there are a few areas that you need to take note. Implementing the 2 "S" : Size and Space....You need a "LED" of the size shown below and a push button that is small enough for you to accomplish what you intend.
--

- LED -
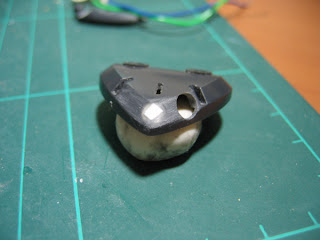
 - glue the LED on the mono eye -
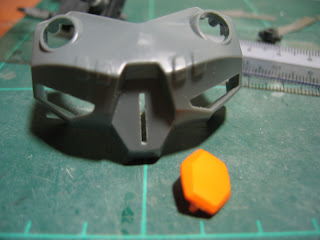
- the orange piece act as the push button -
--

- push button -
 - push button location which is made out of placard
and brass rod -

- mod on the orange piece, the placard extension is
secured by very fine brassrod and superglued, a
hole is drilled on the placard so that it can be
secured, see later pic -
 - the orange piece is secured by the brass rod, it
actually acts as a pivot for the push button -
 - push button secured with super glue -
 - cut out a plastic sheet from the CPU Fan box to make
 a battery compartment -
--

--

- Messy setup for the wiring, luckily there are all hidden -

- LED Testing -

- Mod done and ready for testing -
- Short clip on mod testing -
- Mod. on the mono eye position -
- My forum mate (Acguy4ever) had suggested maybe I should reposition the eye by the side to give it a fiercer look. Indeed it look better after the mod -
- Drill a hole by the side and covered the initial
hole by using placard and super glue -

- Mission accomplished! -
1 comment:
great video.great to see it works.haha.
Post a Comment